The performance benefits of concatenating all of your CSS Stylesheets and Javascripts into two single files are huge. I consider this part of my tutorial series one of the most important ones, because one can feel the impact on your stores frontend performance. The reason why many WordPress & Woocommerce stores individual pages load slow is because of the sheer amount of plugins being used to to achieve sliders, banners, image galleries, zoom images, menus, tabbed navigations, AJAX live searches and other features they all bring an individual Javascript and an individual Stylesheet which in the end sum up to many dozens files being requested via HTTP before the browser can display the page or your customer can interact with your site.
The faster CSS and JS are loaded the faster your site will render in the browser and the snappier your site feels and most important your site will be listed better in search engine result pages.
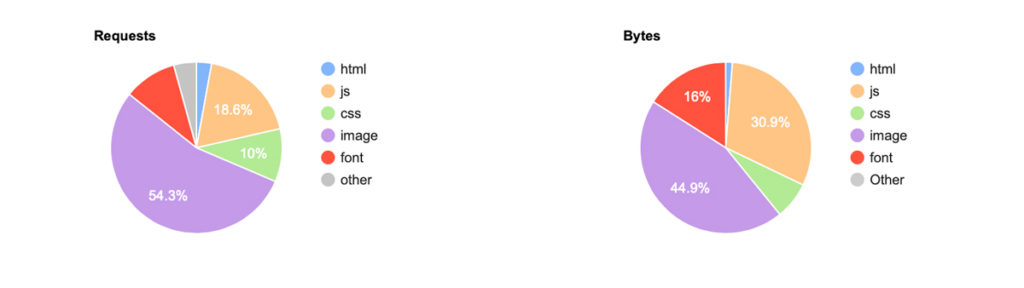
Let’s start by taking a look at webpagetest.org results page. Take a look at the image below. You will most likely see something similar: on the left you can see that more than half of the requests (52% to be exact) are done to either JS or CSS files. On the right you can see that these 52% of requests only amount for about 27% of the data being sent to your visitors browser.

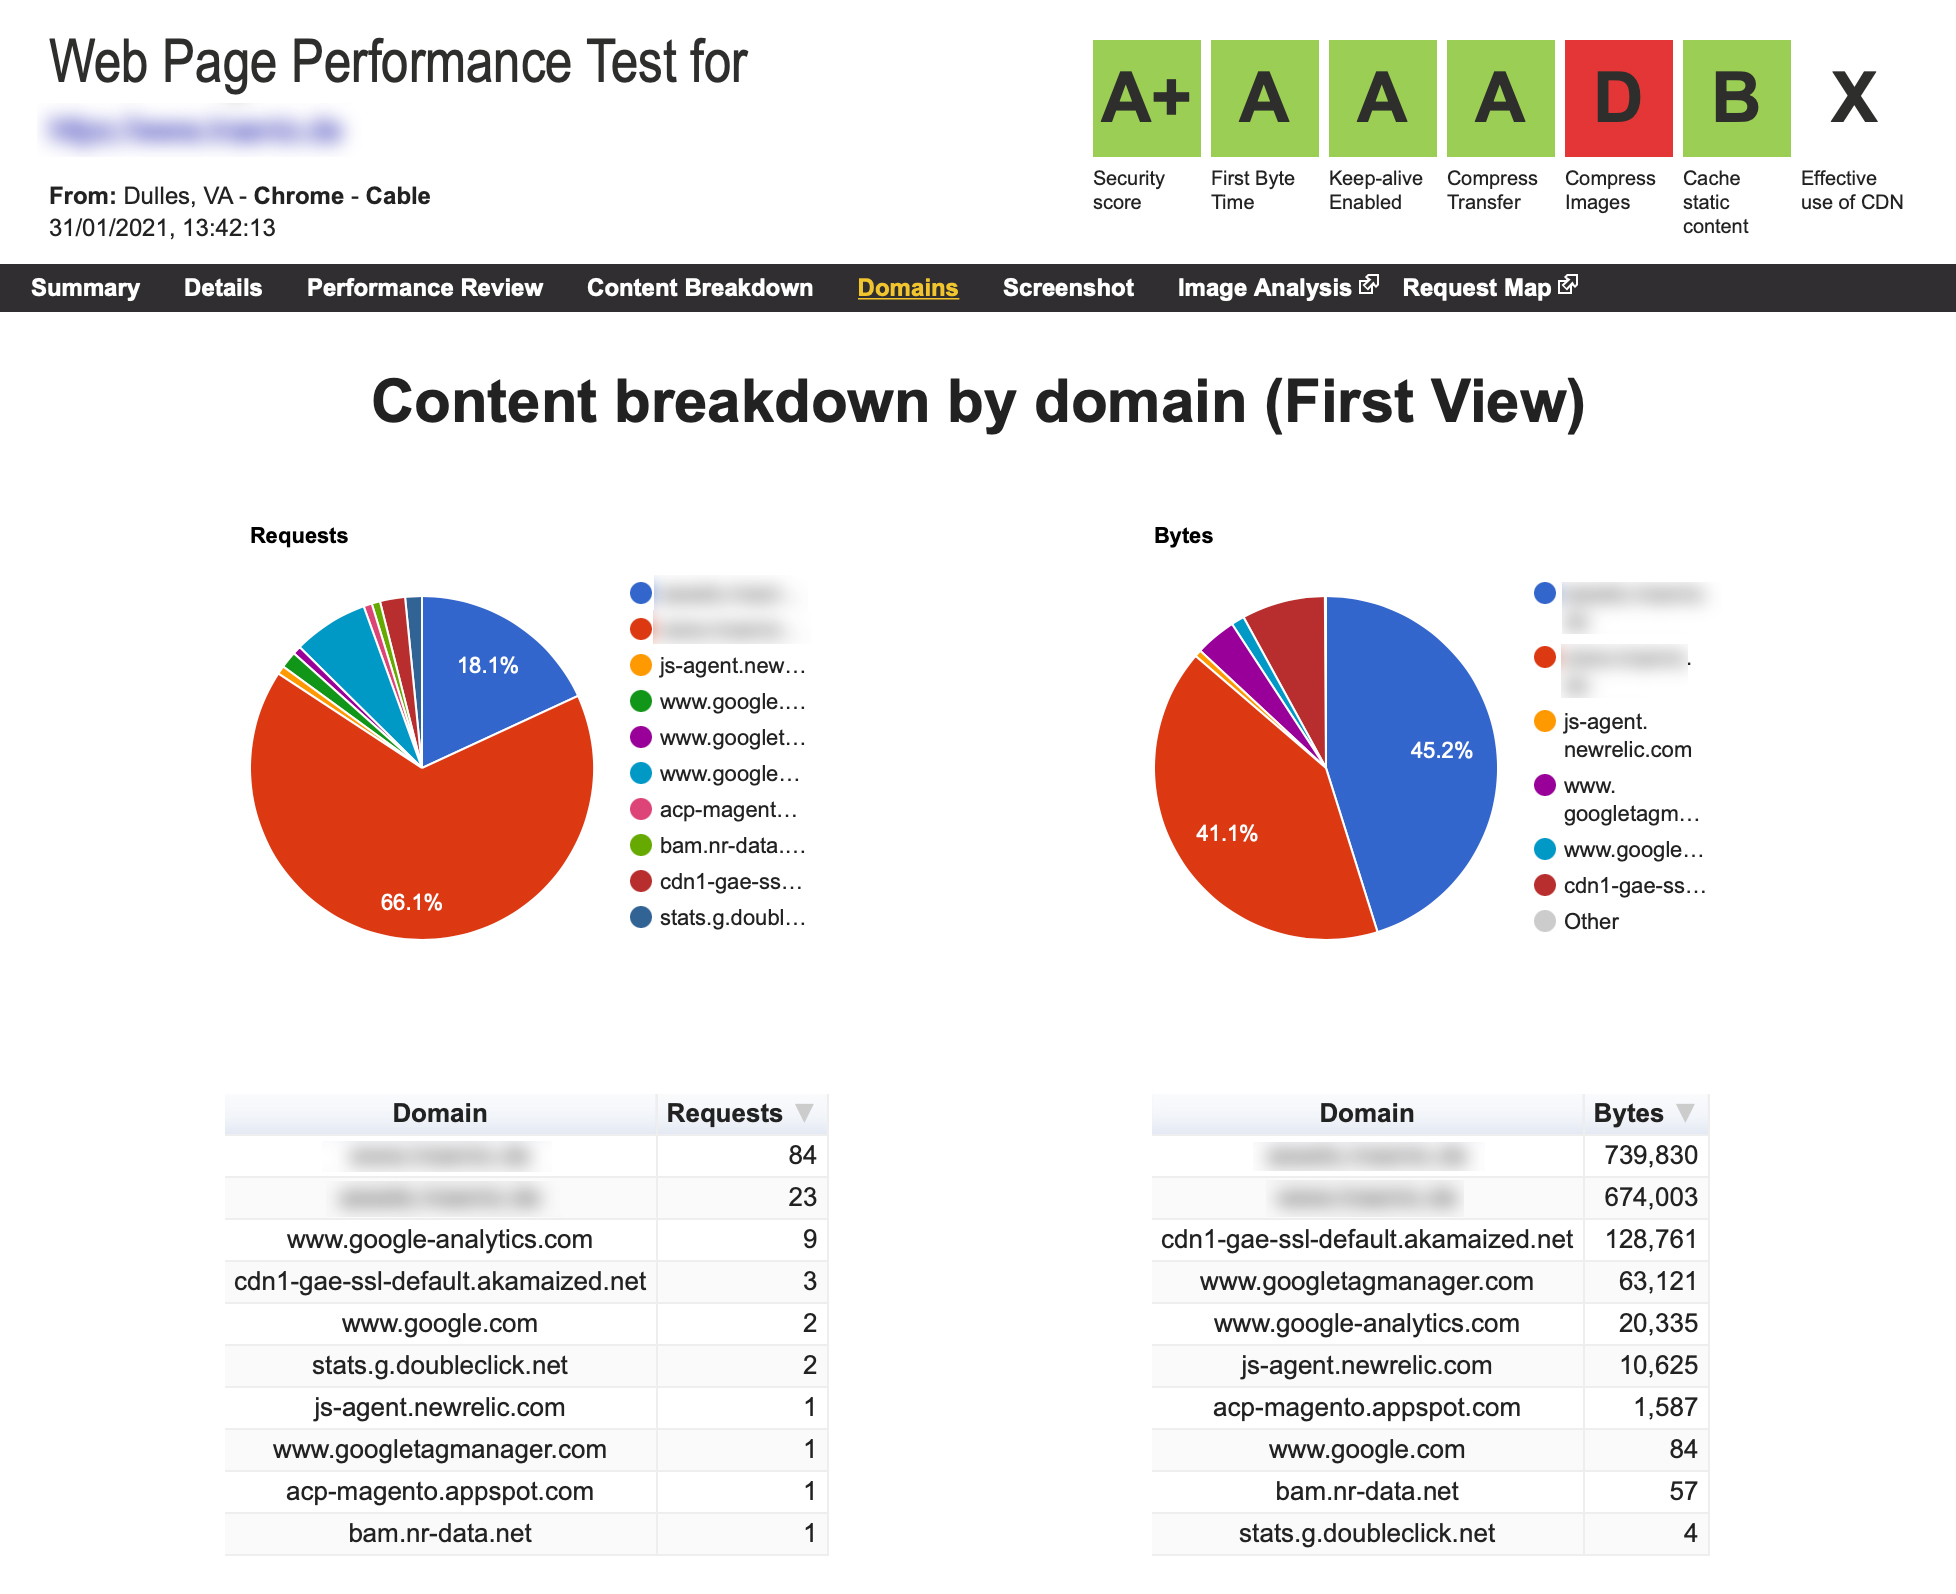
Now let’s take a look at an optimised page. Here we can see, that the requests to bytes ratio is way better. we have 28.6% of requests for JS and CSS files which amounts to 38% of the data sent to the browser. That’s where you want to be, less requests than percentage of data.
Step 1: Installation
The Perfmatters Plugin for WordPress isn’t free so you’ll have tp purchase it, add it to your repository manually. If you have been following all of the articles in this series then you have properly Setup WordPress & WooCommerce with Composer. So additionally you need to add a preserve path for wordpress/wp-content/plugins/perfmatters, to prevent the plugin from being deleted when you deploy to your production server or when you run a composer update.
Step 2: Configuration
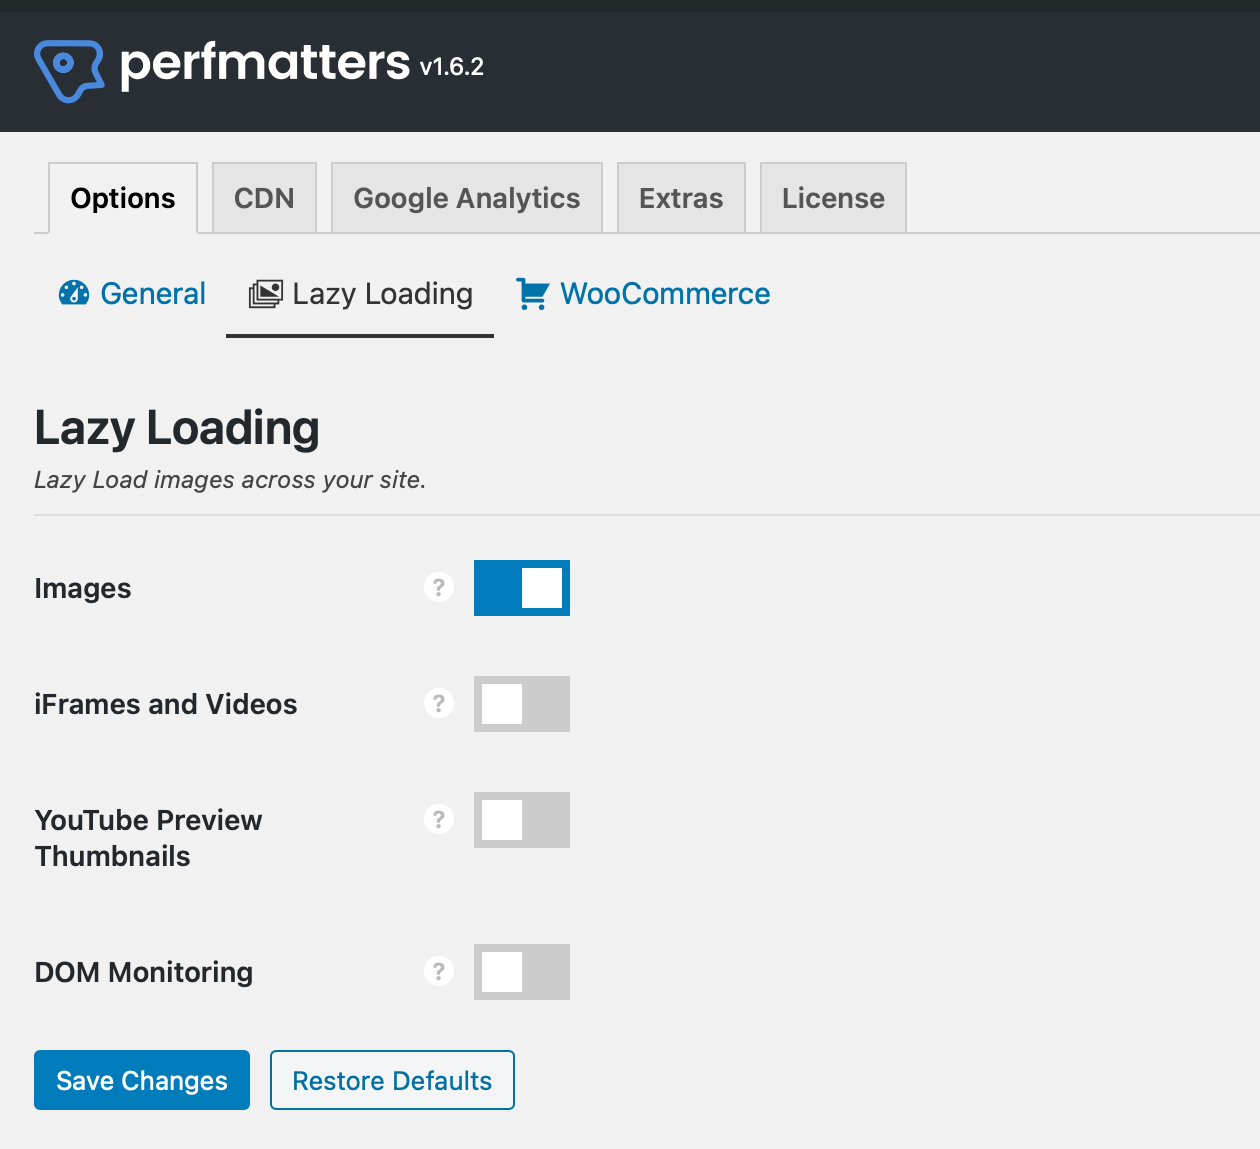
Once we have activated it, we get to configure it. So let’s go through the most important settings.
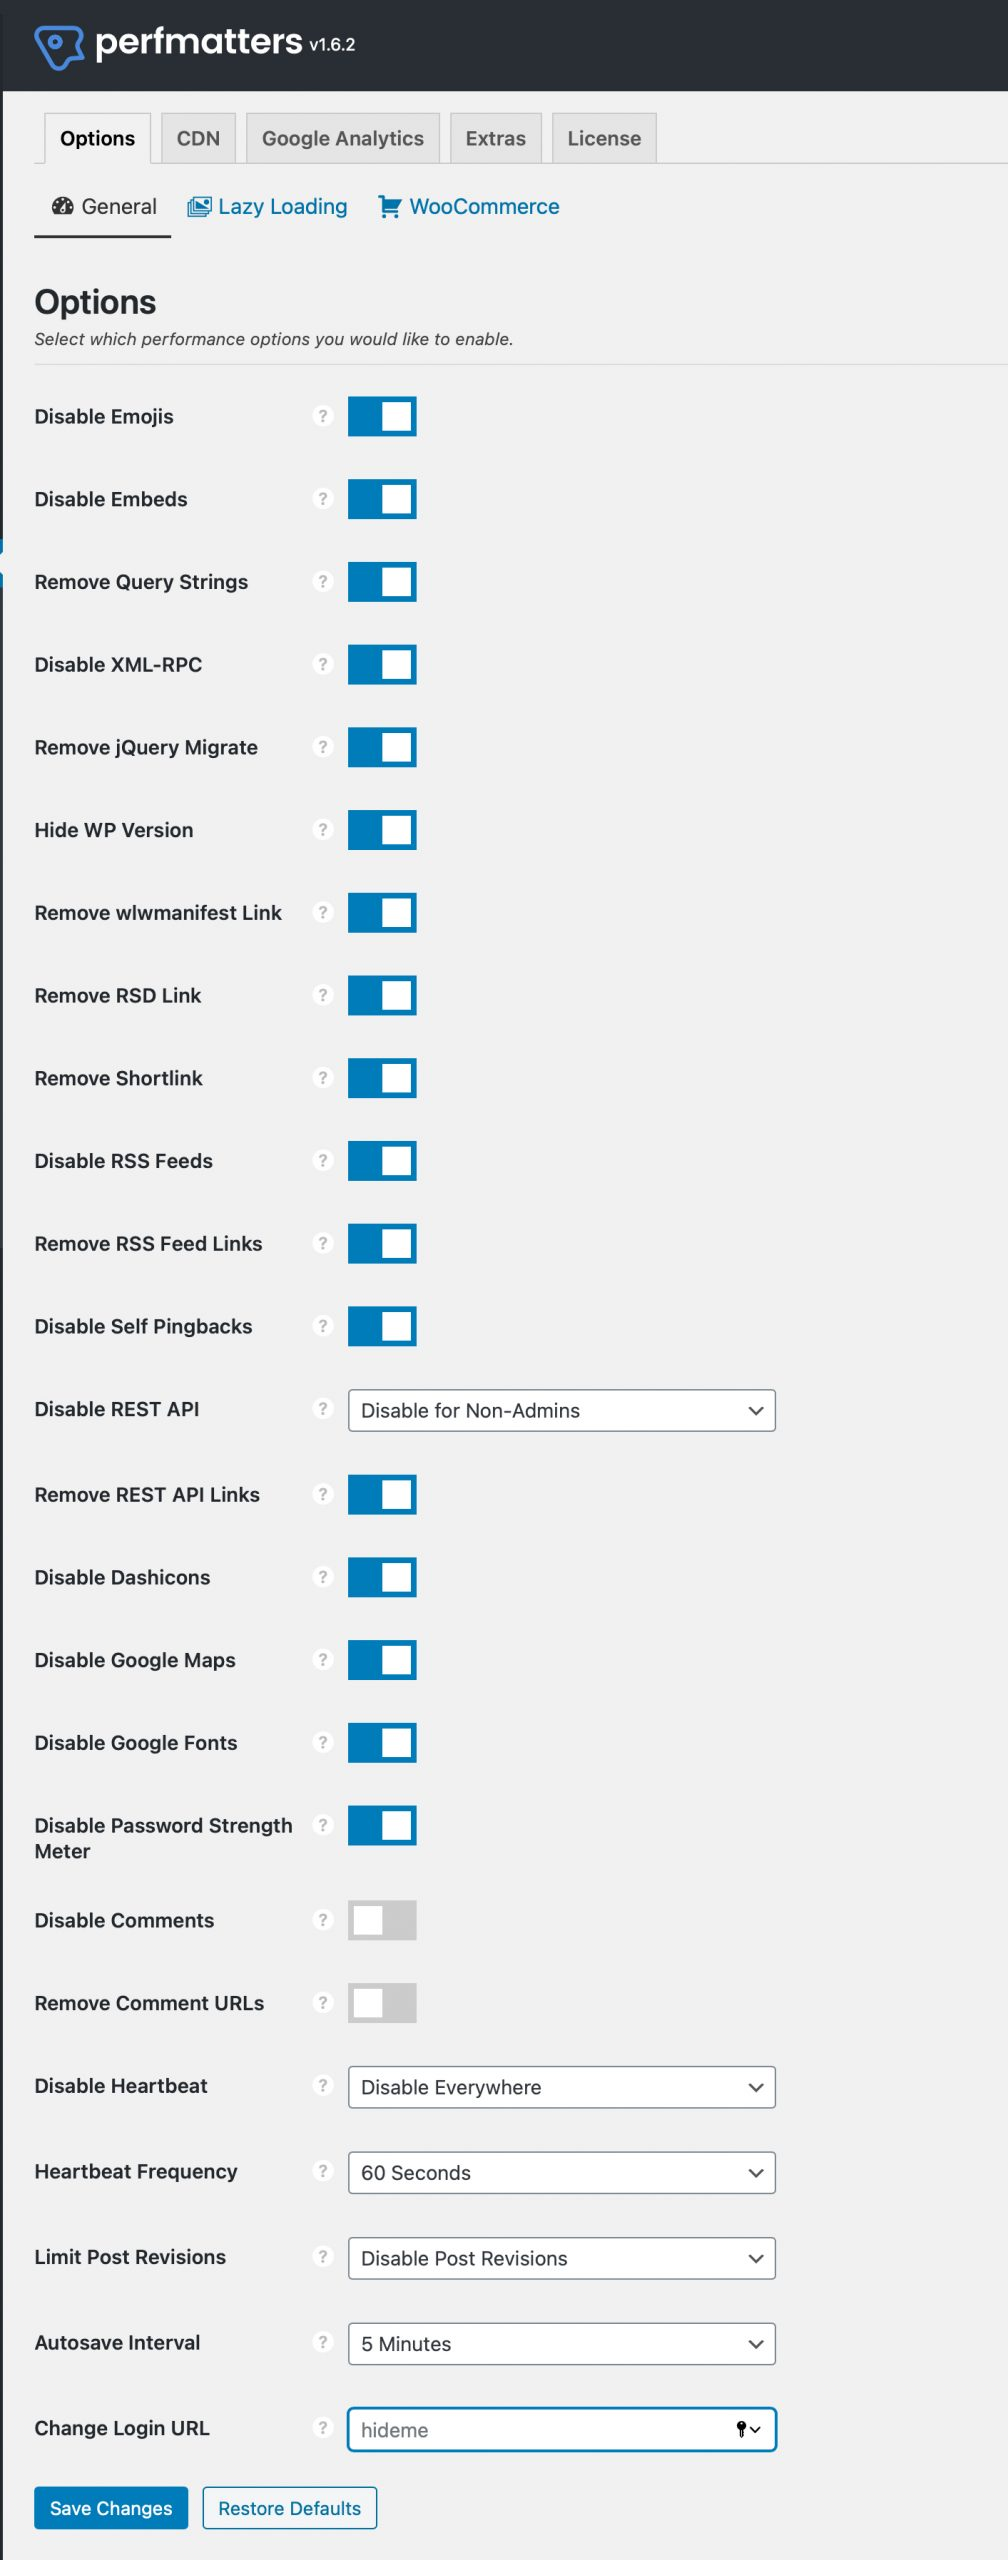 In the general settings tab, you can probably activate each and every setting. Noteworthy is only the dash icons which will affect the toolbar that content editors use frequently (icons won’t show). Deactivating the password strength script is also highly recommended since it is the most bloated oversized script throughout all of WordPress’s frontend at a dazzling 400 kB.

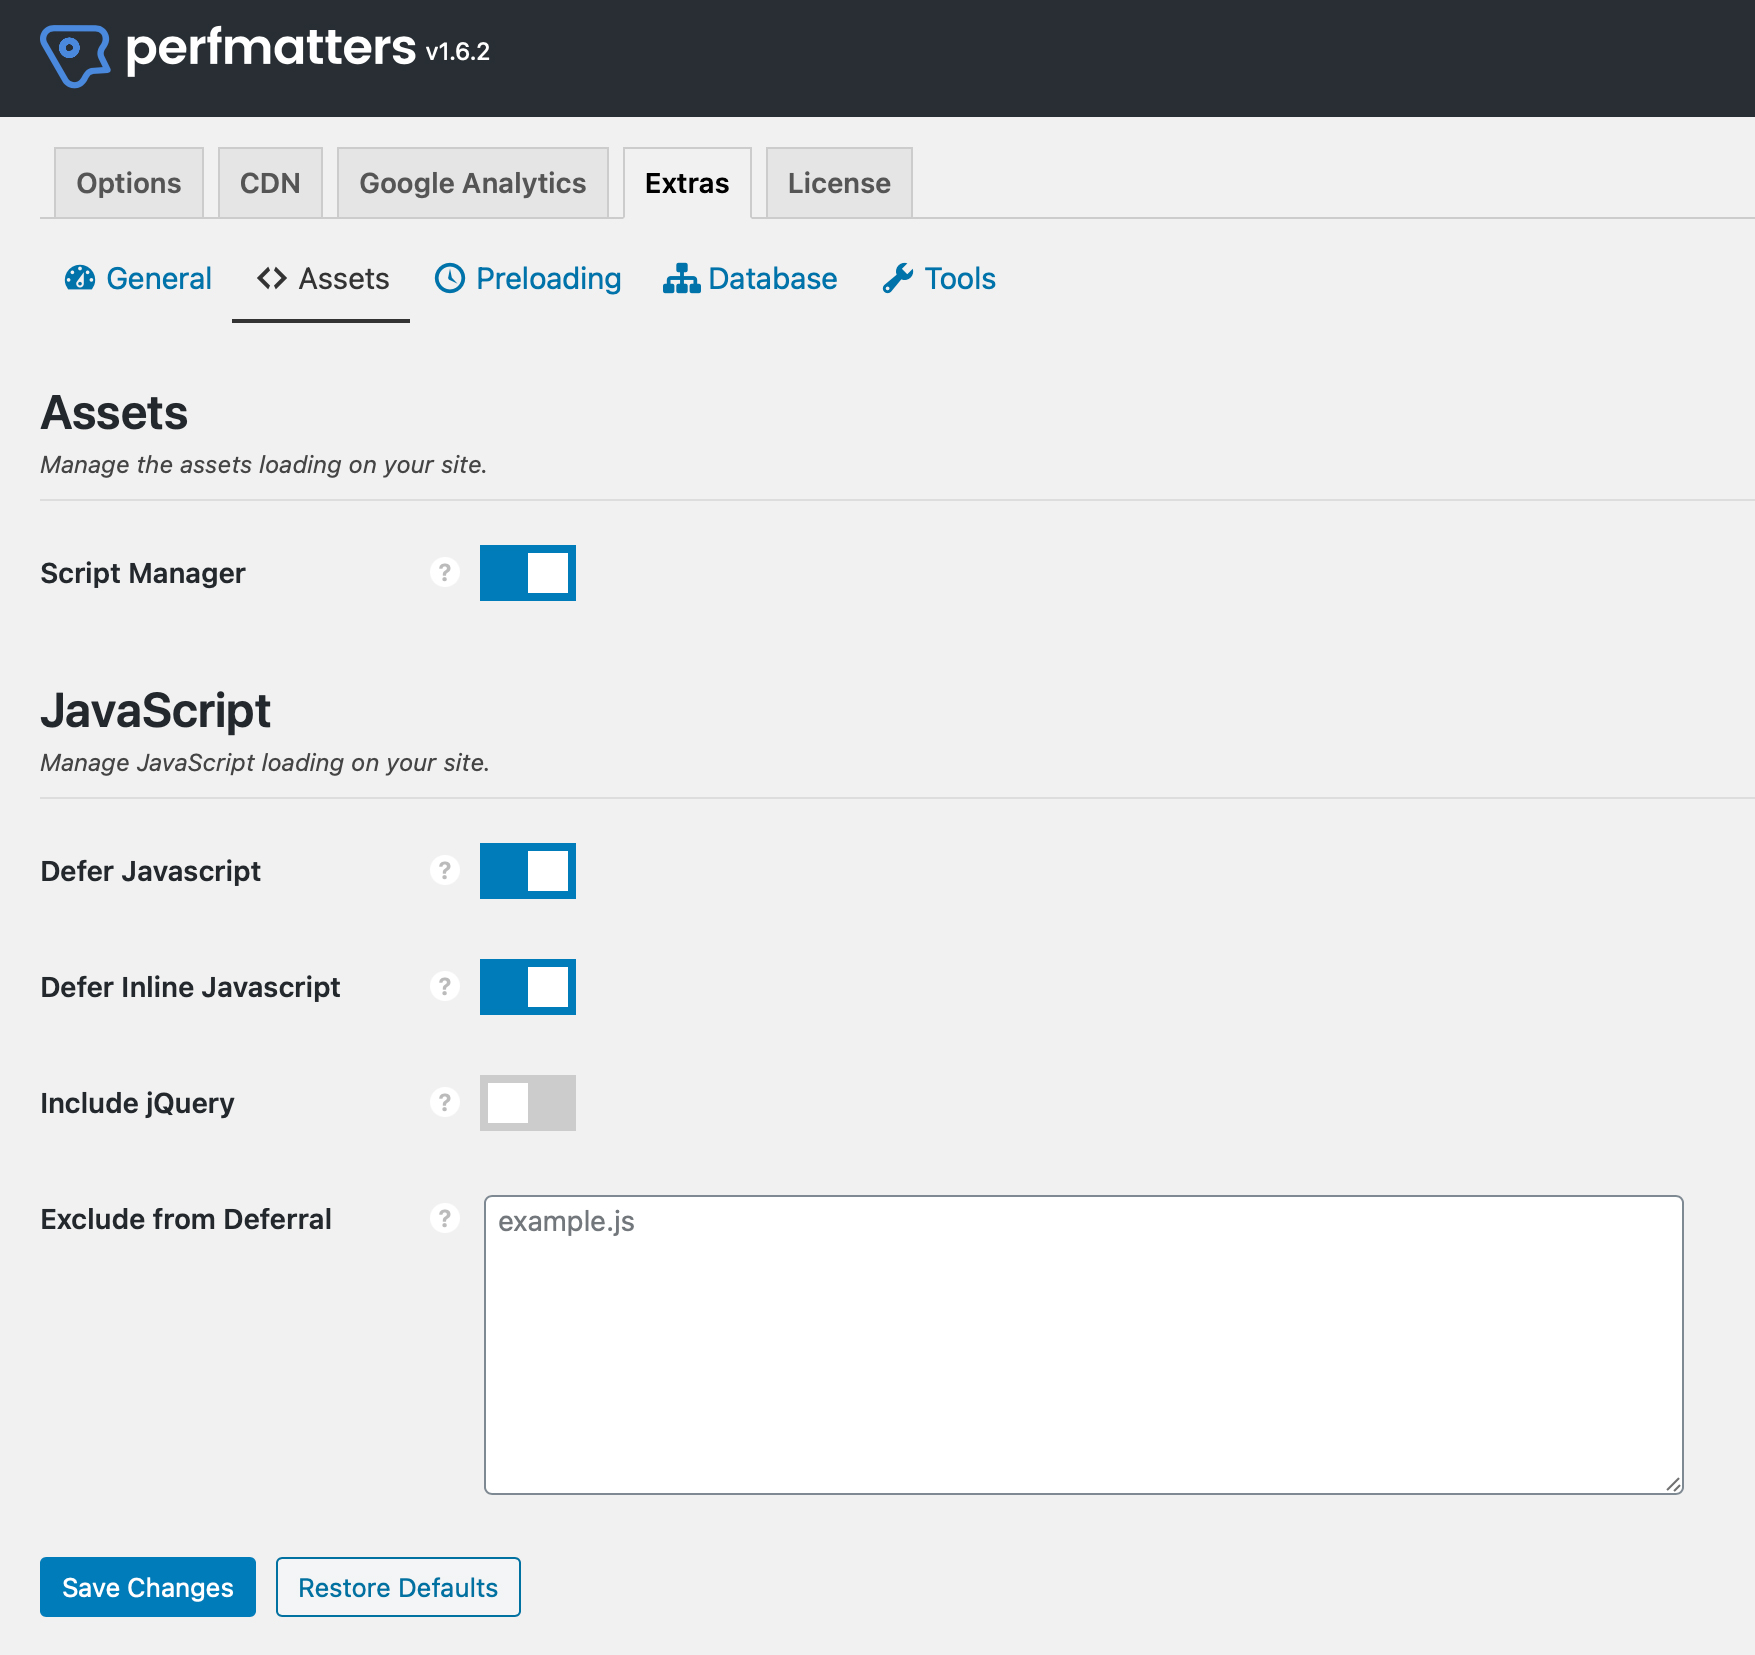

Step 3: Script Manager
This is where it gets interesting. What Perfmatters offers is to manage all javascripts and stylesheets that have been added via enqueue_script and enqueue_style from plugins and themes. We will use this list to create arrays of file paths. Once the Script Manager is activated, head over to https://my-website.com/?perfmatters in your browser. It’s important to know that for each and every page in your store, the list of scripts and styles may vary. This has to do with what a plugin is used for, so on a product detail page you might have different plugins in use than on a category page. Basically what we want to do now is to get a complete list of files and sort them into CSS and JS files. This way we get 2 lists which we will need later for our Gruntfile.

Step 4: Our Gruntfile
To get started we create a file called package.json which defines our node dependencies.
package.json{
    "name": "my-website.com",
    "version": "1.0.0",
    "main": "wordpress/index.php",
    "author": "My Name",
    "dependencies": {
        "node-sass": "^4.14.1",
        "grunt": "^0.4.5",
        "grunt-cli": "^1.3.2",
        "grunt-concat-css": "^0.3.2",
        "grunt-contrib-sass": "^0.7.3",
        "grunt-contrib-uglify": "^5.0.0",
        "grunt-contrib-cssmin": "^3.0.0",
        "grunt-notify": "^0.4.5",
        "grunt-sass": "^3.1.0"
    }
}
Then we run npm install which will install the required dependencies into a folder called node_modules. We should this node_modules folder to our .gitignore file to prevent it from being committed to our repository.
Now we create our basic Gruntfile which will compile or build our frontend resources for us.
Gruntconst sass = require('node-sass');

/** @desc your non-minified Javascript files go in here */
const js_files = [
    'wordpress/wp-includes/js/jquery/jquery.js',
    'wordpress/wp-content/plugins/some-plugin/js/some-plugin.js',
    ...
];

/** @desc your non-minified Stylesheets go in here */
const css_files = [
    'wordpress/wp-content/themes/storefront-child/css/jquery.selectbox.css',
    'wordpress/wp-content/plugins/some-plugin/css/some-plugin.css',
    ...
];

/** @desc your Sass files go in here */
const sass_files = [
    'wordpress/wp-content/themes/storefront-child/style.scss',
    'wordpress/wp-content/plugins/woocommerce/assets/css/*.scss',
    ...
];

module.exports = function(grunt) {

    grunt.loadNpmTasks('grunt-contrib-watch');
    grunt.loadNpmTasks('grunt-contrib-copy');
    grunt.loadNpmTasks('grunt-concat-css');
    grunt.loadNpmTasks('grunt-contrib-sass');
    grunt.loadNpmTasks('grunt-sass');
    grunt.loadNpmTasks('grunt-contrib-uglify');
    grunt.loadNpmTasks('grunt-curl');
    grunt.loadNpmTasks('grunt-contrib-cssmin');
    grunt.loadNpmTasks('grunt-notify');

    grunt.registerTask('default', [
        'sass',
        'cssmin',
        'concat_css',
        'uglify:dev',
        'uglify:dist'
    ]);

    grunt.initConfig({
        pkg: grunt.file.readJSON('package.json'),
        cssmin: {
            options: {
                mergeIntoShorthands: true,
                roundingPrecision: -1,
                sourceMap: true,
                keepSpecialComments: 0
            },
            target: {
                files: {
                    'wordpress/assets/css/style.min.css': css_files
                }
            }
        },
        concat_css: {
            all: {
                src: css_files,
                dest: 'wordpress/assets/css/style.css'
            },
        },

        sass: {
            options: {
                implementation: sass,
                banner: '/*! <%= pkg.name %> <%= pkg.version %> style.css <%= grunt.template.today("yyyy-mm-dd h:MM:ss TT") %> */\n',
                style: 'expanded'
            },
            files: [{
                expand: true,
                cwd: 'wordpress/wp-content/themes/storefront-child/',
                src: sass_files,
                dest: 'wordpress/assets/css',
                ext: '.css'
            }]
        },
        uglify: {
            dist: {
                options: {
                    banner: '/*! <%= pkg.name %> <%= pkg.version %> scripts.min.js <%= grunt.template.today("yyyy-mm-dd h:MM:ss TT") %> */\n',
                    report: 'gzip'
                },
                files: {
                    'wordpress/assets/js/scripts.min.js' : 'wordpress/assets/js/scripts.js'
                }
            },
            dev: {
                options: {
                    banner: '/*! <%= pkg.name %> <%= pkg.version %> scripts.js <%= grunt.template.today("yyyy-mm-dd h:MM:ss TT") %> */\n',
                    beautify: false,
                    compress: false,
                    mangle: false
                },
                files: {
                    'wordpress/assets/js/scripts.js' : js_files
                }
            }
        }
    });
};
Okay, now that’s a lot to go through.
- first we define three arrays, since in most website projects we have these three different kind of files: .css. scss and .js
- the default task defines the order of processing: first we compile .scss files, then we Concatenate all .css files into one style.css, and finally we uglify (minify) our concatenated style.css file as style.min.css
- for .js files its a bit simpler, we just uglify our javascript files, once without compression into scripts.js and once with compression into scripts.min.js
You can now run Grunt by typing grunt.
Step 5: Modify our theme
Now, to make use of these new minified files we need to edit our theme. We will add the css to our <head> And we will add our new Javascript to the very end of our theme, right before the </body> tag.
<!-- this goes to your <head> -->
<link rel="stylesheet" type="text/css" href="/assets/css/styles.min.css" media="all" />
<script type="text/javascript" src="/assets/js/scripts.min.js" defer="defer"></script>
If you have set up your site to use an .env file then you could modify these two lines in order to only send the minified versions in your production environment, like so:
<!-- this goes to your <head> -->
<link rel="stylesheet" type="text/css" href="/assets/css/styles<?php echo (WORDPRESS_ENV === 'production') ? '.min' : '' ?>.css" media="all" />
<script type="text/javascript" src="/assets/js/scripts<?php echo (WORDPRESS_ENV === 'production') ? '.min' : '' ?>.js" defer="defer"></script>
And if you also have set up Continuous Integration then you would also want to add an additional version GET parameter in order to make sure the visitor always gets the latest releases’ CSS and JS like this:
<!-- this goes to your <head> -->
<link rel="stylesheet" type="text/css" href="/assets/css/styles<?php echo (WORDPRESS_ENV === 'production') ? '.min' : '' ?>.css?v=<?php echo md5(trim(file_get_contents(ABSPATH . 'version.txt'))); } ?>" media="all" />
<script type="text/javascript" src="/assets/js/scripts<?php echo (WORDPRESS_ENV === 'production') ? '.min' : '' ?>.js?v=<?php echo md5(trim(file_get_contents(ABSPATH . 'version.txt'))); } ?>" defer="defer"></script>
This way you can set JS and CSS Resources cache lifetime to a really high value and don’t have to worry that the user gets old stylesheets or scripts. Because upon every deploy, the version parameter will be different and force the browser to get the new file.
Caveats
By implementing this sort of build process for JS & CSS files, we gained a lot of performance. The downside here is, that by adding new plugins to WordPress we always have to do additional steps to ensure that it’s scripts and styles are included in our Gruntfile. But since performance matters, we should always prefer having an additional step rather than having degraded website performance.
Continue to part 8 of this tutorial series: Reduce logging in your production environment.


